Air Plant Display — DIY Tropical Centerpiece
From tropical rain forests to the high elevations of the Andes mountains, air plants are are found across a large variety of environments making them naturally suited to many decorative themes. An air plant holder display can be minimalistic and modern, adventurous and exotic (like this one!), or anything in-between.
Join us as we design a tropical centerpiece and be inspired for your next project! As always, use this DIY as a springboard for your own imagination and take your piece to a whole new place.
Project 2: Tropical Air Plant Display
This project is a continuance from the Grapevine Air Plant Holder and combines our Fairy Garden Basket and Douglas Fir Orchid Bark to create a centerpiece for a tropical or beach themed dinner table, entry way, or patio.
There are many materials and shapes for containers to choose from, but the fresh green moss of the Fairy Garden Basket has a very distinct style and large, workable space to arrange many different projects.
Let’s get started!
What You’ll Need:
Grapevine Air Plant Holder
For starters, if you haven’t done so already, you will need to check out Project 1 where we created a beach terrarium within a grapevine planter. It is tons of fun and this project elevates the arrangement even further.
Orchid Bark
This Douglas Fir bark is organic and sustainably harvested. In addition to being as a potting medium, it makes for a lovely addition in floral and craft projects.
Fairy Garden Basket
Although normally a home for fairies (as the name implies), this basket has found its way into so much more. With a 20 inch diameter, we will be able to fit quite a bit into this piece.
Air Plants
Of the air plants we used in Project 1, we felt the biggest plant, the Xerographica, would do best in the larger space provided by the basket rather than in the planter.
Leftovers from the Beach Terrarium Kit
After making the Grapevine Air Plant Holder, we still have material left over to use for the remaining project:
Candle & Holder
A simple votive candle and glass container will do just fine. We are going to give it it’s own special touch with remaining materials from the Beach Terrarium Kit in the last project.

Step 1: Pour Orchid Bark into the Basket
We will be using a fair amount of bark to get the height needed for our display. Pour the bark evenly around the basket and smooth it out create a flat, working space for the rest of the arrangement.
In addition to or instead of orchid bark, you could also fill the basket with sea glass or even lava-rock!
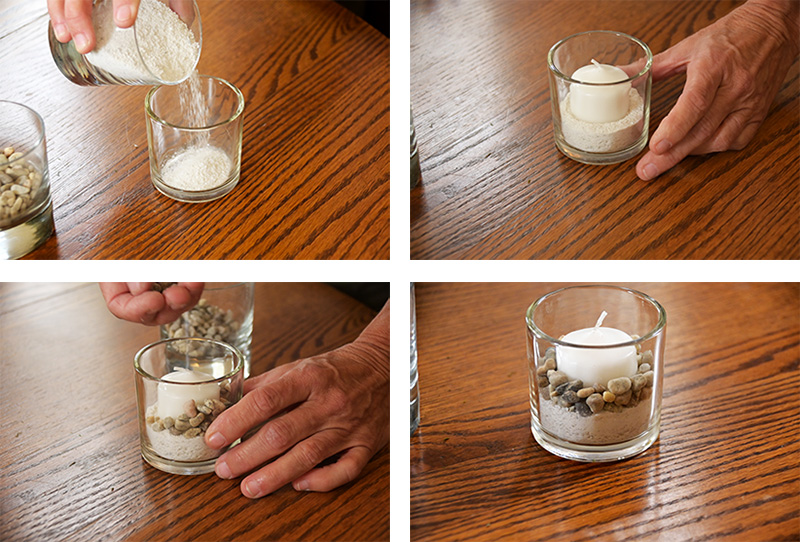
Step 2: Decorate Your Candle
Using sand left over from the Beach Terrarium Kit in Project 1, pour enough to fill 1/3 of your display container. Then place your candle into the center of the glass making sure the candle is snug, but not buried.
Next, using some of the remaining gravel from the same kit, carefully add rocks around the edges, filling the gap between the candle and the glass container. This layered look turns your ordinary candle into something more earthy, natural, and elegant.
Set the candle aside for now and we will add it to our arrangement at the end for a final touch.
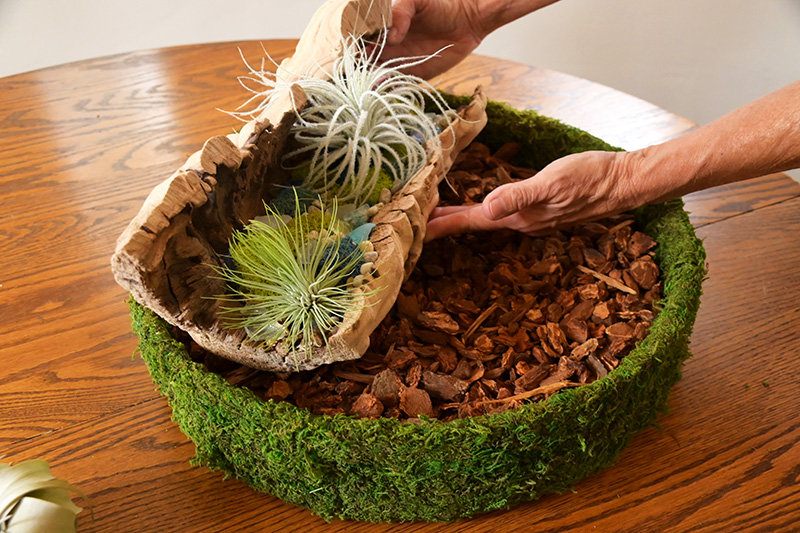
Step 3: Add the Grapevine Planter
Being careful not to jostle the air plants and decorations, place the grapevine planter edge and centered in the back of the basket. You can gently rock the planter back and forth into the bark if you feel it needs a stronger resting point.
Be sure to leave plenty of room for the rest of the arrangement.
At this point you should step back, and see if the height of the bark is suitable. If the bark is too low and it looks like the planter is sinking into the basket, then now is the time to add more. The grapevine planter and air plants should be proudly displayed.
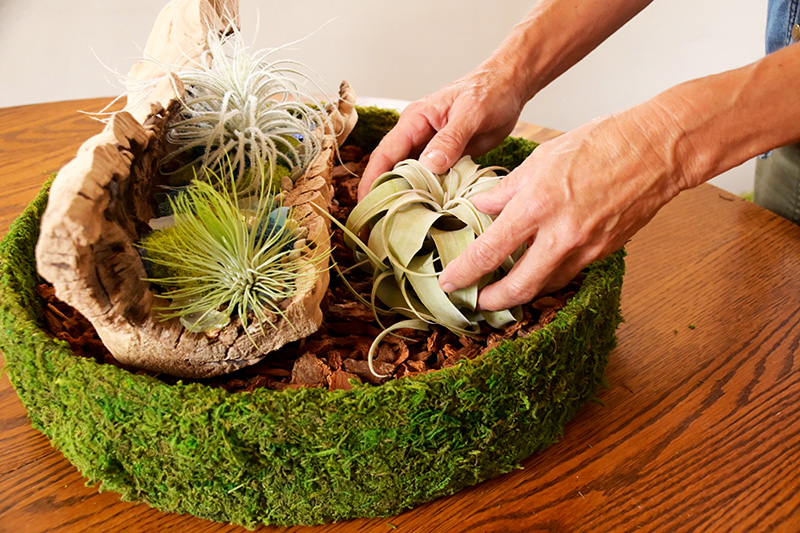
Step 4: Place Your Air Plant
We chose the largest of our three air plants, the Xerographica, to be placed in the basket. It’s beautiful violet bloom will make for a terrific front-row display should we get lucky.
We don’t want the arrangement to be crowded, so if possible, leave space between the air plant and the grapevine planter.
Again, check that the height of the bark is going to work for you. If the air plant is hidden behind the rim of the basket, then you may want to add more bark. If you are using an air plant with a small base to it, you can gently tuck the air plant into the bark, but don’t go too far — air plants do not need to be planted like rooting plants.

Step 5: Place Your Decorated Candle
Your candle should be placed in an area where the bark is stable. Similar to the air plant and the grapevine planter, you can rock the candle into the bark to give it a sturdy foundation. The last thing we want is the candle to tip over!
On that note, we also want to make sure the candle has plenty of room away from the air plants — we don’t want to singe their beautiful leaves!
Really any candle can be used during this step. Do you have an old candle collecting dust somewhere? Just make sure that there is a dish of some kind protecting the flame from reaching the bark. Try paring different colored candles with the different colors of Reindeer Moss.
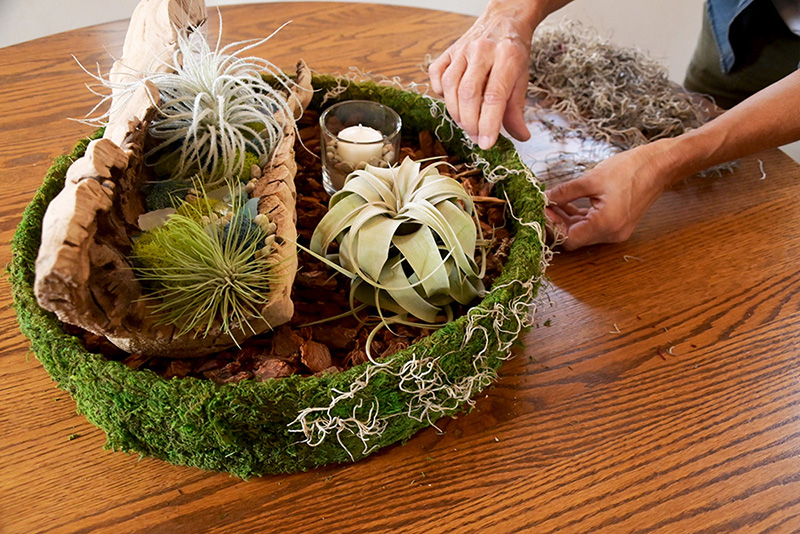
Step 6: Decorate the Basket with Spanish Moss
To add an extra element towards our tropical theme, we take the Spanish Moss that was used for packing the Beach Terrarium Kit and hang a few strands at a time across the rim of the basket.
We found that a combination of hooking a portion of the moss over the rim and working the strands into the moss of the basket was enough to secure the moss effectively. However, glue can be used for a more permanent solution.
Spanish Moss comes in a variety of colors. How cute would it be to match the colors of the moss to the bloom of your air plants?!
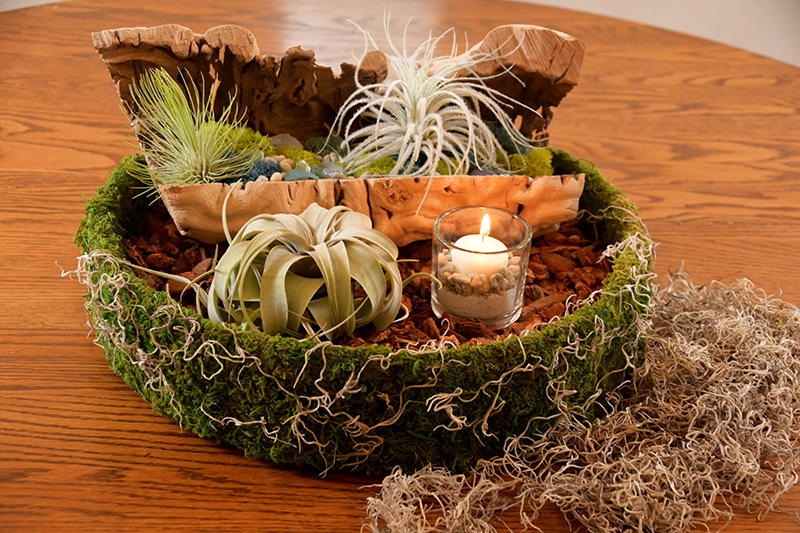
The Tropical Air Plant Display is Ready to Be Lit!
Place the entire arrangement where it will remain displayed and get your candle lighter.
Your new piece is looking good! Grab a glass of wine and a good book and spend some time with your air plant friends — or show them off at your next gettogether!


Leave a Reply